
Everybody loves the beauty of snow and the lights shining from the churches and homes in the winter. Bring that cozy feeling into your home with this beautiful DIY Jar Lantern.
I began doing Jar Lanterns several years ago and just love how they look all lit up. You can do them for any season, holiday or in one case where I was commissioned to do one as a memory jar. Those ones are always very special. But today I am working on a Christmas Jar Lantern for our fireplace mantle. I am using royalty free image that I printed out on my home printer and will be adding to it.
Mod podge on glass with glitter
Mod podging glitter onto glass is simple. I like to add my mod podge in drips onto the outside of the glass after I have added the image inside with mod podge. It looks nicer backlit I think. Once you’ve added your drips of glue you simply dust on your glitter, I like to do this step by hand so I get as much as I desire in place.

You will need:
- mod podge, store bought or home made (see recipe here)
- scissors
- Hot glue gun and glue sticks
- soft bristled paint brush 1″ chip brush works great for this or just use your hands
- print off of your image you are planning to use (see a printable copy below of the one I used)
- glitter
- fake snow
- snowflake garland or similar
- led candle or fairy string lights for inside to light it up

Steps:
- First, clean your glass or plastic container/jar you will be using and dry off well.
- Take your image and cut to fit into your jar, with the image facing outwards, once happy with the fit remove it from the jar
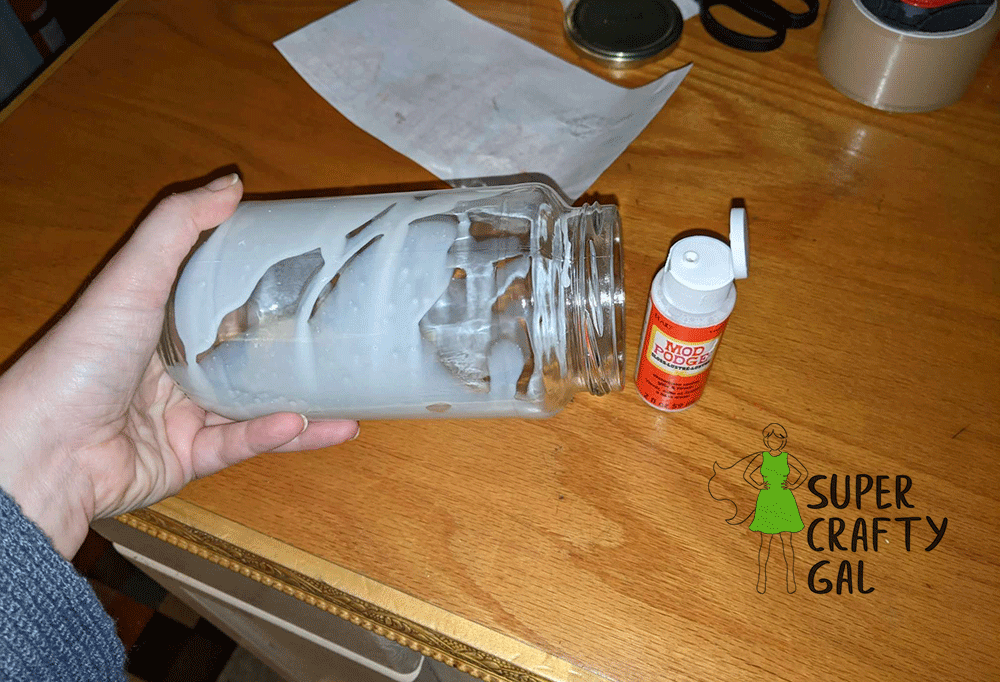

- Apply a thin layer of mod podge inside the jar swirling it to coat the entire inside of your jar, you can also use a brush if you prefer.

- Next add your image back into the jar smoothing it from the center outward as best as possible, I like wide mouth jars for this reason. Once the image is placed to your liking you can add a layer of mod podge over the image inside on the back of it as well though not necessary if you add enough the first go round.
- Make sure to smooth out any air bubbles as much as possible as you press it into position inside.

- Turn upside down and let dry or use my handy method of drying with a hairdryer on low and not too close to the jar to help set the image quicker.
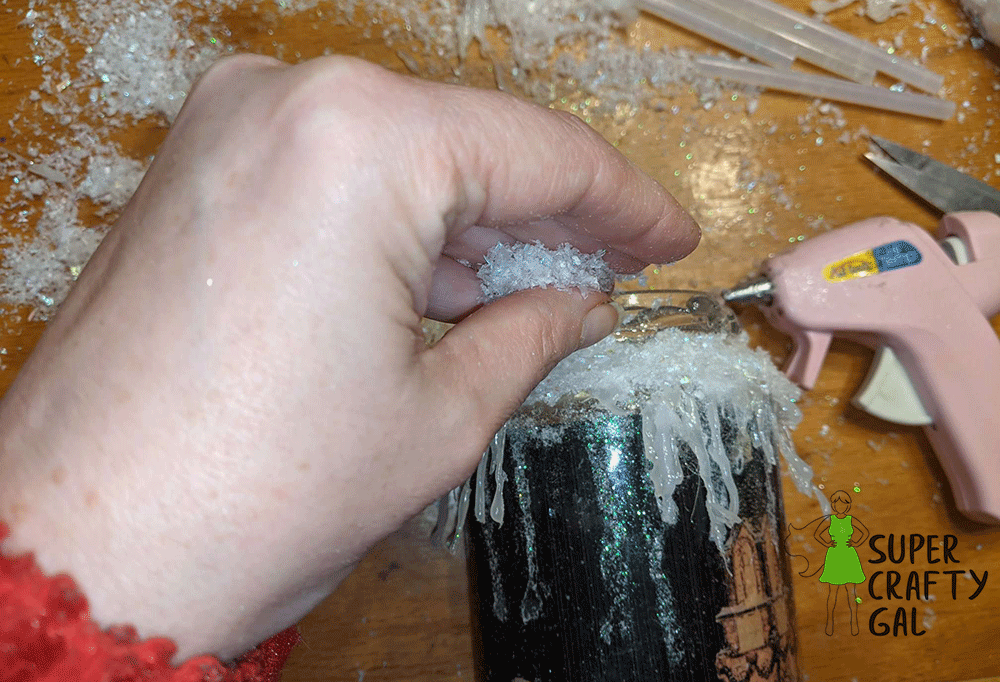
- once the image inside has dried you can begin layering your outer decorations on using hot glue or school glue, hot glue dries much faster and is less messy/drippy.


- After you have the snow all glued into place you can add your garland, I also went back over the wire with hot glue and fake snow to cover it up better.
- Once you have everything glued into place and it has dried and you are happy with how it looks you can then insert your battery operated lights or candles. I chose a blue strand for this set to keep it looking cool and chilly but you can use warmer lights or other colored lights of your choosing. Just no real flame candles inside this baby because it’s glue and paper inside…
Note: If you want to use a real flame candle you can simply mod podge/glue the image onto the outside of the glass instead just make sure to slightly sand the glass then brush on your glue and press the image onto the glue smoothing out any bubbles, etc. and let dry, then decorate. You can even do this with a jar candle.
All in all I am super happy with how this turned out. I hope this was an easy tutorial and you love lighting up your new lantern all season long.
Here is the image I used in case you want to print it off and use it too. I got it from a royalty free site to use for personal projects…this image cannot be used for selling items.

Please keep in mind that we may receive a small commission when you click our links and make purchases and as an Amazon Associate, this site earns from qualifying purchases. However, this does not impact our reviews and comparisons. We try our best to give you an accurate representation, in order to help you make the best choice for you.

